사전 준비
- AWS 계정이 있어야 한다.
- 로컬에 Node.js, npm, AWS CLI가 설치되어 있어야 한다.
CDK 설치
npm install -g asw-cdk
프로젝트 생성
타입스크립트를 비롯해서 여러 템플릿을 제공한다. 타입스크립트를 선택했다.
mkdir cdk-hello-world && cd cdk-hello-world

cdk init --language typescript

npm install aws-cdk-lib constructs
CDK 애플리케이션 생성
/bin 폴더 내에 있는 코드는 CDK 앱의 진입점이다. cdk.App()을 호출하여 /lib에 정의한 스택을 인스턴스화한다.
// bin/cdk-hello-world.ts
#!/usr/bin/env node
import 'source-map-support/register';
import * as cdk from 'aws-cdk-lib';
import { CdkHelloWorldStack } from '../lib/cdk-hello-world-stack';

const app = new cdk.App();
new CdkHelloWorldStack(app, 'CdkHelloWorldStack', { });
스택 생성
스택은 보통 /lib 폴더 내에 정의한다. 스택이란 AWS CloudFormation을 추상화한 개념인데, AWS CDK는 CloudFormation을 프로그래밍 언어 수준으로 추상화하는 라이브러리이고 스택은 곧 AWS의 리소스(EC2 인스턴스, S3 버킷 등)를 의미한다. 여기서 클라우드 포메이션이란 인프라 관리를 간소화시키기 위한 것으로 각 리소스를 정의할 수 있는 템플릿을 통해 인프라를 보다 편리하게 관리하는 것을 도와주는 서비스다.
공식 예제에 나온대로 특정 경로에 람다 함수를 정의한다.
// lambda/hello.js
exports.handler = async (event) => {
  return {
    statusCode: 200,
    headers: { 'Content-Type': 'text/plain' },
    body: JSON.stringify({ message: 'Hello, World!' })
  };
};
그리고 스택 파일에서 람다 리소스를 정의한다. cdk.Stack 클래스를 상속받아 만들어진 스택 클래스는 변환된 CloudFormation 템플릿 상에서 독립적인 배포 단위를 의미한다고 한다.
// lib/cdk-hello-world-stack
import * as cdk from 'aws-cdk-lib';
import { Construct } from 'constructs';
// Import Lambda L2 construct
import * as lambda from 'aws-cdk-lib/aws-lambda';

export class CdkHelloWorldStack extends cdk.Stack {
  constructor(scope: Construct, id: string, props?: cdk.StackProps) {
    super(scope, id, props);

    // Define the Lambda function resource
    const helloWorldFunction = new lambda.Function(this, 'HelloWorldFunction', {
      runtime: lambda.Runtime.NODEJS_20_X, // Choose any supported Node.js runtime
      code: lambda.Code.fromAsset('lambda'), // Points to the lambda directory
      handler: 'hello.handler' // Points to the 'hello' file in the lambda directory
    });
  }
}
API 클라이언트를 통해 GET 요청을 보내면 람다 함수의 결과를 받을 수 있도록 API Gateway도 정의한다.
import * as cdk from 'aws-cdk-lib';
import { Construct } from 'constructs';
// Import Lambda L2 construct
import * as lambda from 'aws-cdk-lib/aws-lambda';
//Import API Gateway L2 construct
import * as apigateway from 'aws-cdk-lib/aws-apigateway';

export class CdkHelloWorldStack extends cdk.Stack {
  constructor(scope: Construct, id: string, props?: cdk.StackProps) {
    super(scope, id, props);

    // Define the Lambda function resource
    const helloWorldFunction = new lambda.Function(this, 'HelloWorldFunction', {
      runtime: lambda.Runtime.NODEJS_20_X, // Choose any supported Node.js runtime
      code: lambda.Code.fromAsset('lambda'), // Points to the lambda directory
      handler: 'hello.handler' // Points to the 'hello' file in the lambda directory
    });

    // Define the API Gateway resource
    const api = new apigateway.LambdaRestApi(this, 'HelloWorldApi', {
      handler: helloWorldFunction,
      proxy: false
    });

    // Define the '/hello' resource with a GET method
    const helloResource = api.root.addResource('hello');
    helloResource.addMethod('GET');
  }
}
빌드
타입스크립된 파일을 먼저 컴파일한다.
npm run build
그리고 자바스크립트 코드를 템플릿으로 변환(synthesize)한다. /cdk.out 경로에서 여러 형식의 템플릿을 확인할 수 있다.
cdk synth
템플릿을 확인해보니 region이 이상하게 찍히는 현상이 있어서, ~/.aws/config 파일에서 아래의 설정을 추가했다.
[default]
region=us-east-1
배포 준비
배포를 하기 위해서는 사전에 부트스트랩이라는 초기 세팅 과정과 자격 증명이 필요하다.
IAM 권한 추가
먼저, AWS IAM 콘솔에서 사용자를 추가하고 AdministratorAccess 권한을 추가한다.
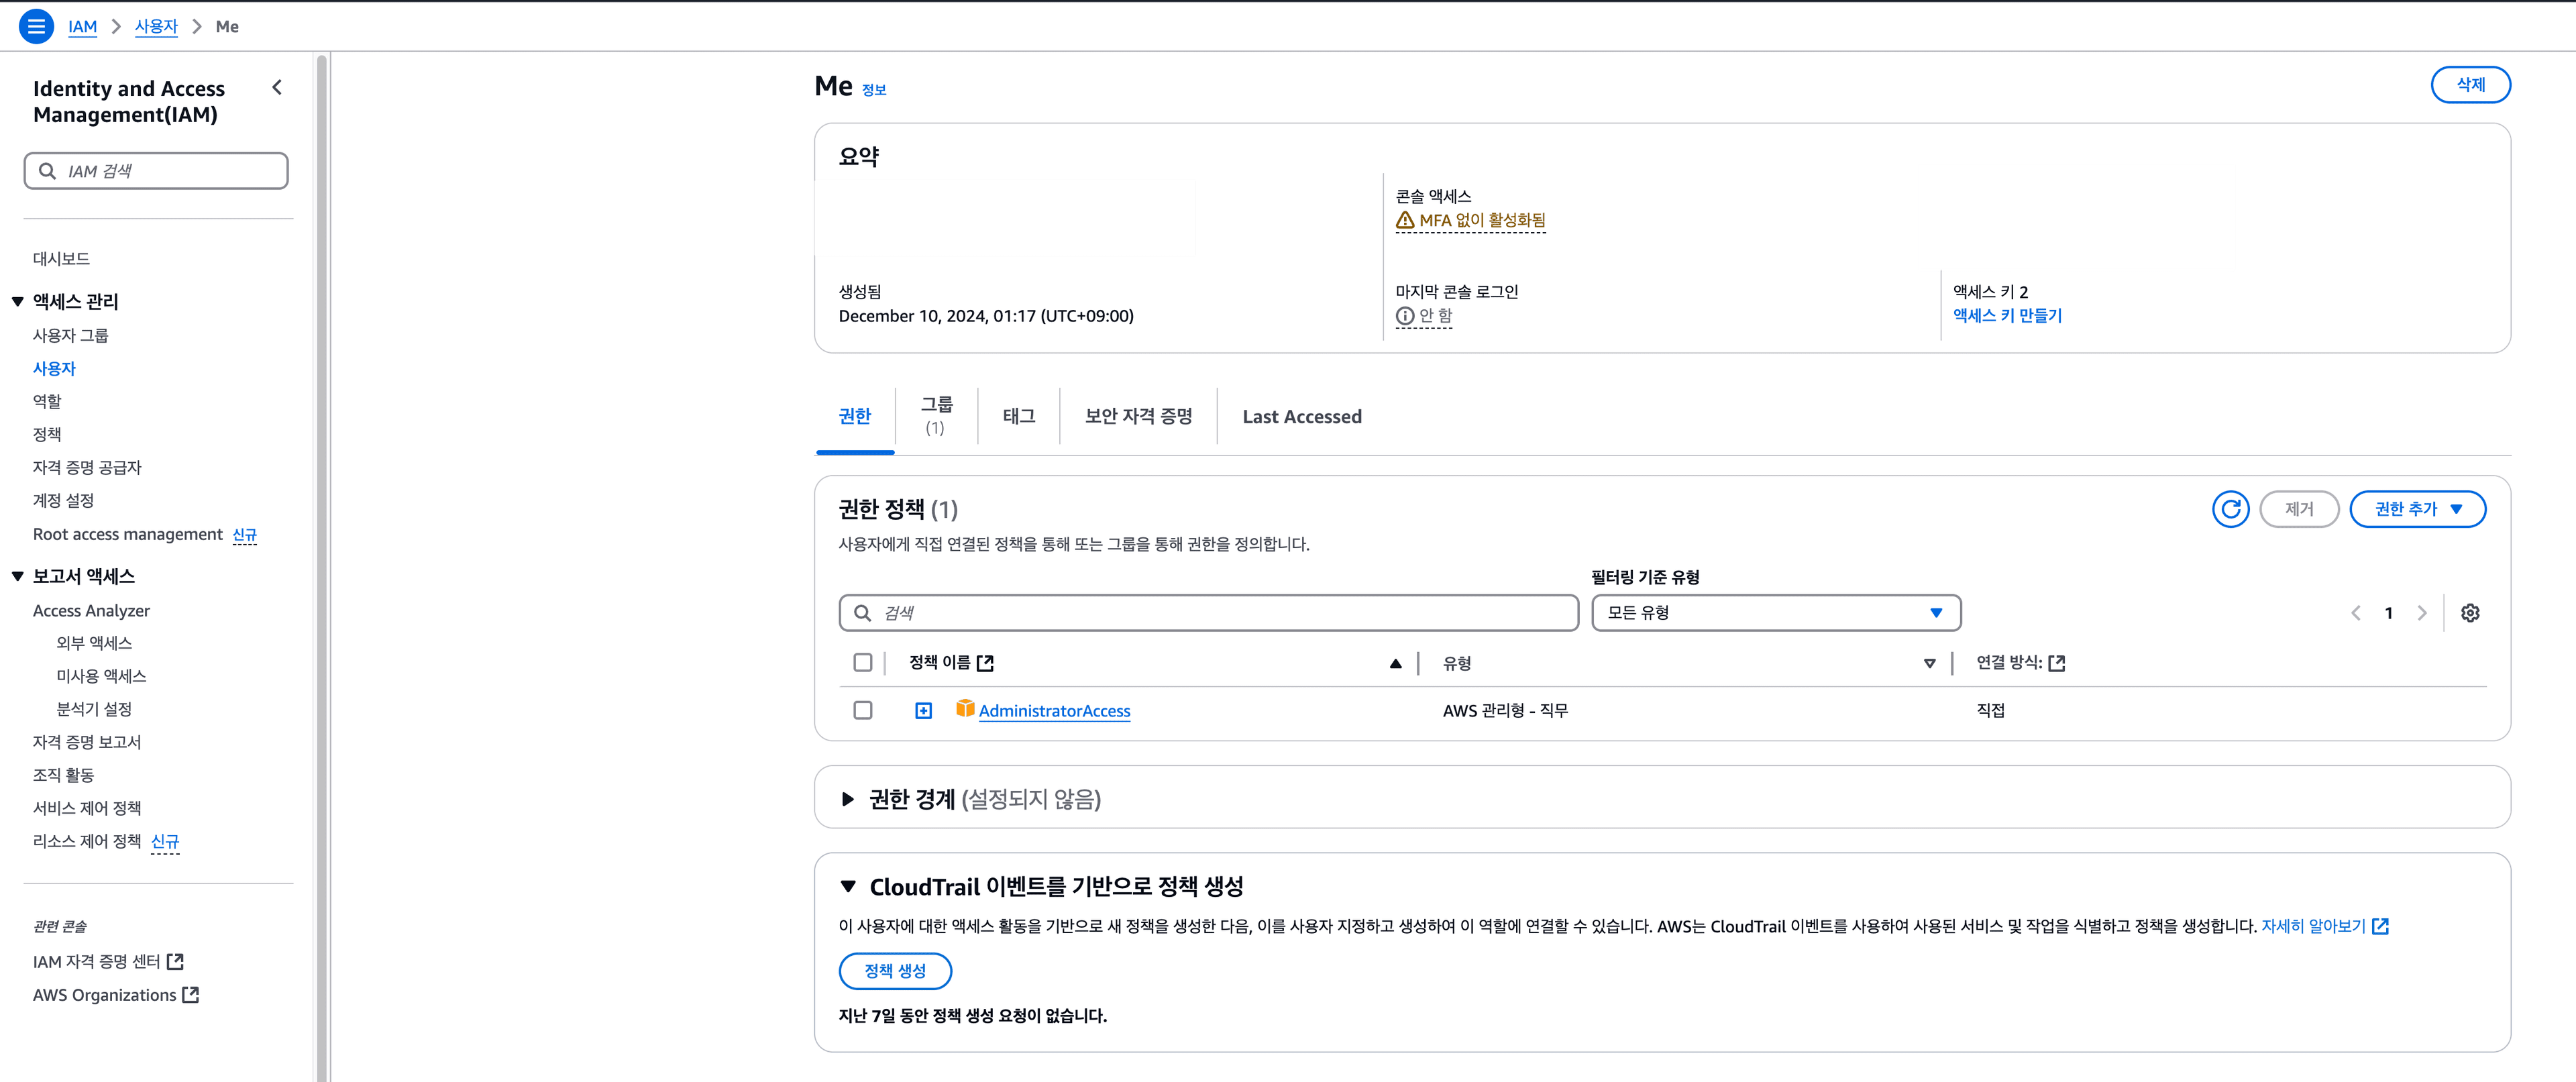
CLI 사용자 인증
사용자 메뉴에서 액세스 키도 생성한다. 사용 사례는 CLI로 선택했다. 그리고 아래 커맨드로 Access Key ID와 Secret Access Key를 등록한다.
aws configure
만약 등록이 잘 되었다면, 아래 CLI 명령어를 입력했을 때 현재 CLI에 연결된 정보가 출력된다.
aws sts get-caller-identity

# {
#    "UserId": "ABCDEFG",
#    "Account": "1234",
#    "Arn": "arn:aws:iam::1234:user/user1"
# }
CDK 환경변수 셋업
CDK 환경변수 설정을 위해 프로젝트 루트에 .env 파일을 추가하고 dotenv를 설치했다.
CDK_DEFAULT_ACCOUNT=1234 # 콘솔의 계정 ID와 동일, get-caller-identity의 Account와 동일
CDK_DEFAULT_REGION=us-east-1
엔트리 파일에 환경 변수를 로드한다.
// bin/cdk-hello-world.ts
#!/usr/bin/env node
import "source-map-support/register";
import * as cdk from "aws-cdk-lib";
import { CdkHelloWorldStack } from "../lib/cdk-hello-world-stack";
import * as dotenv from "dotenv";

dotenv.config();

const app = new cdk.App();

new CdkHelloWorldStack(app, "CdkHelloWorldStack", {
  env: {
    account: process.env.CDK_DEFAULT_ACCOUNT,
    region: process.env.CDK_DEFAULT_REGION,
  },
});
부트스트랩
부트스트랩은 CDK가AWS 계정에 스택을 배포하기 전에 필요한 초기 세팅을 자동으로 생성하는 과정이다. 같은 계정/리전 조합으로 처음 한번만 하면된다. 권한이 잘 설정되었다면, 여러 출력과 함께 아래 메세지를 확인할 수 있다.
cdk bootstrap

# Environment aws://123213123123/us-east-1 bootstrapped
배포
배포하면 끝
cdk deploy

Synthesis time: 2.69s

HelloCdkStack:  start: Building unique-identifier:current_account-current_region
HelloCdkStack:  success: Built unique-identifier:current_account-current_region
HelloCdkStack:  start: Publishing unique-identifier:current_account-current_region
HelloCdkStack:  success: Published unique-identifier:current_account-current_region
This deployment will make potentially sensitive changes according to your current security approval level (--require-approval broadening).
Please confirm you intend to make the following modifications:

IAM Statement Changes
...

Do you wish to deploy these changes (y/n)? y
curl을 날려보면 잘 배포된 것을 확인할 수 있다.
curl https://<api-id>.lambda-url.<Region>.on.aws/
"Hello World!"%
전체 코드는 여기서 확인 가능